

Developer Essential Series: The Terminal
Grasping Essential Commands in the Terminal


The terminal is one of many ways of talking to your computer. It's different from clicking around the screen with your mouse. Instead, you type commands to tell the computer what to do.
If you want to become a developer, learning the terminal is essential. Sometimes, the normal way of clicking and dragging with your mouse doesn't do everything you need. The terminal can do a lot more, and it does it fast!
By learning the terminal, you also open the door to more cool things to do. One of many things is called shell scripting where instead of typing one command at a time, you can write a bunch of them in a script, and the computer will do all of them in order. It's a great skill for a developer to have! After going through this tutorial, you should be someone who can use the basic features of a bash terminal.
Note: If you're using Windows, click here to install Bash to run the commands I'll present here.
So, let's get started!
Opening a Bash terminal
To open the terminal on your computer, there's a program called "Terminal".
It's usually found in your list of applications or you can simply press "CMD + Space" to open the search prompt and you can type in "Terminal".

When the program opens, you will see a window with a blinking cursor. This is where you can type commands. It usually has a bit of text already there, but you don't need to worry about that.
To guide you through most of these fundamental commands, we'll create a simple directory structure to represent a planetary system.
Viewing Contents of a Directory
Listing all folders and files (ls command)
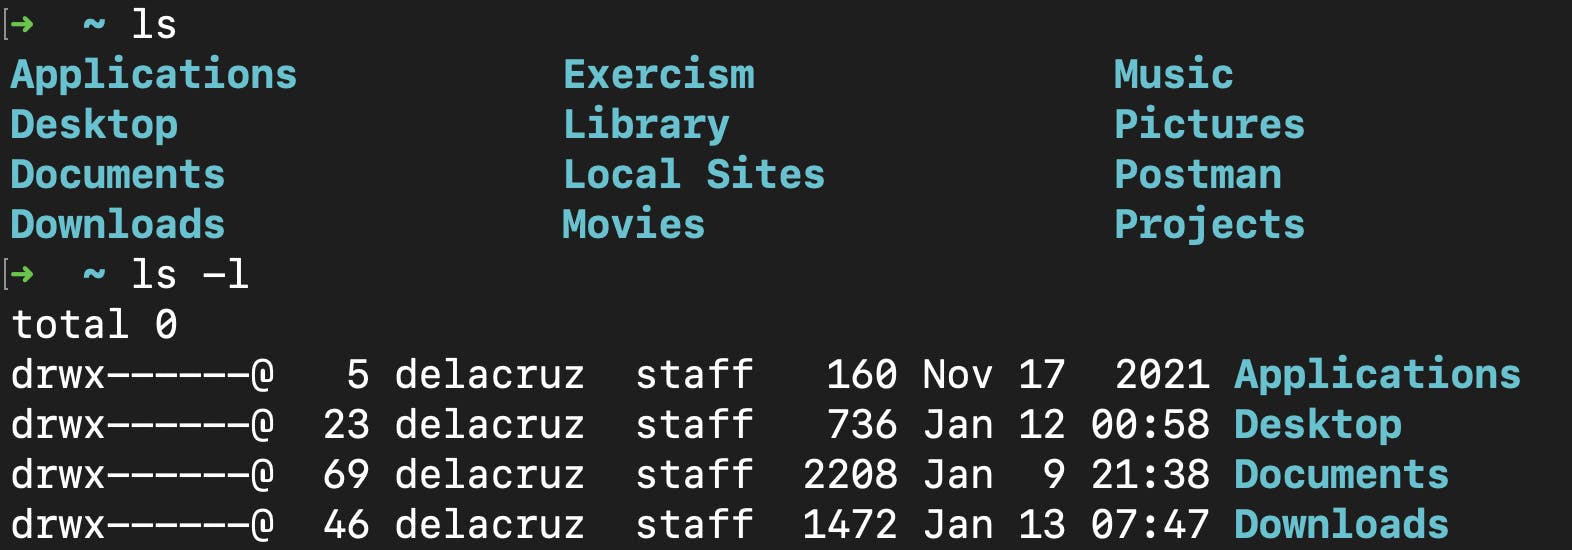
Since opening the terminal you should be in your root(home) directory. To see the files and directories in the current directory you would use the ls command and press "Enter".
ls
Directories Applications/, Desktop/, Documents/, Downloads/ etc., are the directories inside of the root directory.
Understanding file and folder listings
ls will only show the files and folders but some options show more information about the files and folders using this format when typing the following:
ls [Options] [File]
Here are some of the most commonly used ones:
ls -l
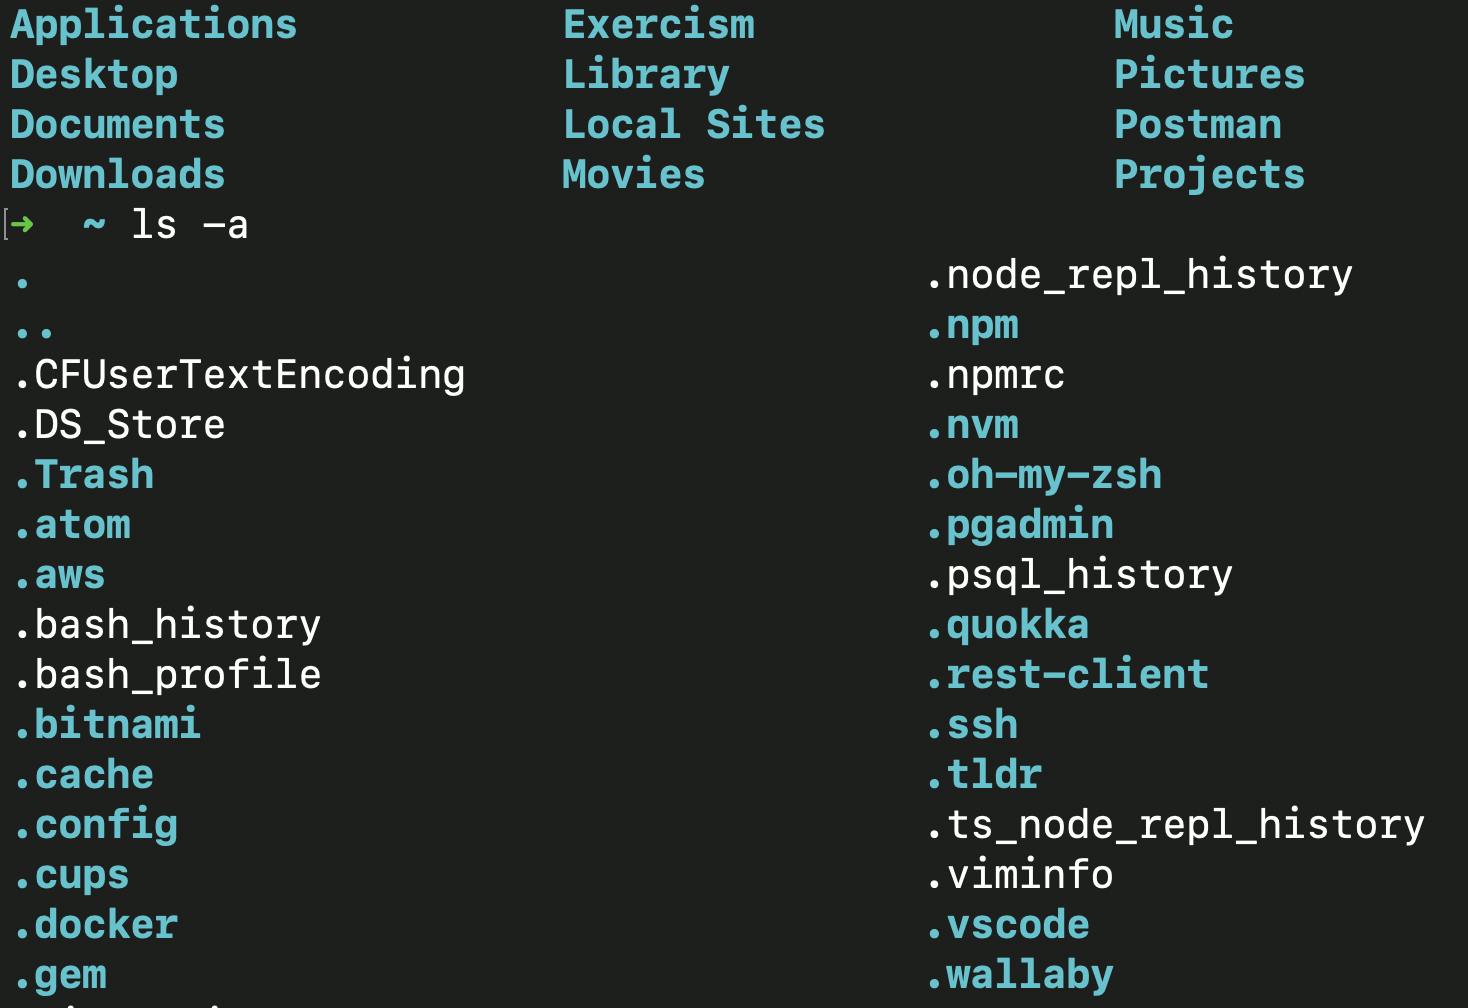
ls -a
ls -l provides you with a detailed list that includes the file sizes, modification dates, and permissions.
ls -a shows all files, including hidden ones (those starting with a dot).
Now that you know the most basic command for seeing the contents of your root directory. Let's get a bit more interactive.
Navigating the File System
Here you'll learn how to move around different folders (directories) on your computer, just like you would using Finder, but instead, you'll be typing commands. Here's a breakdown of how to do it:
First, you need to see what folders are available to you, so go ahead and type the ls command:

Let's go into the first command of this section:
Navigate to the folder (cd command)
To see what's inside the Applications folder, type cd to navigate to the folder and press "Enter":
cd Applications
You should see the content inside your Applications folder if you type in ls and press "Enter".

Here you'll see two directories, Chrome/ and Apps.localized/.
Go back one level (cd .. command)
To go back one level from the current Applications folder, you will be back in the root directory by typing in cd .. and pressing "Enter".
cd ..
As you can see below, you are back in the root directory.

Note I mentioned going back one level which is what we did. If you're nested inside multiple folders, you can always add / and .. together to go back multiple levels. Each .. is one level back. Such as this:
cd ../../..
Here you'd be going back three levels.
Go back to the root folder (cd ~ command)
Notice in the screenshot above, after the arrow you'll see a squiggly line that looks like this: ~
This means you're in the root directory.
Usually, if you're deep down the rabbit hole of directories and you want to go back up to the root directory without using a command that looks like this:
cd ../../../../..
You'd want to just use the following commands:
cd ~
Or you can simply use ~. Go ahead and experiment with it on your own. Otherwise, let's move on to the best section, how to manage files and folders.
File and Folder Management
Now that you know how to list directory content and navigate directories, here you'll learn how to manage files and folders using the command line. This includes creating, renaming, copying, and deleting files and folders.
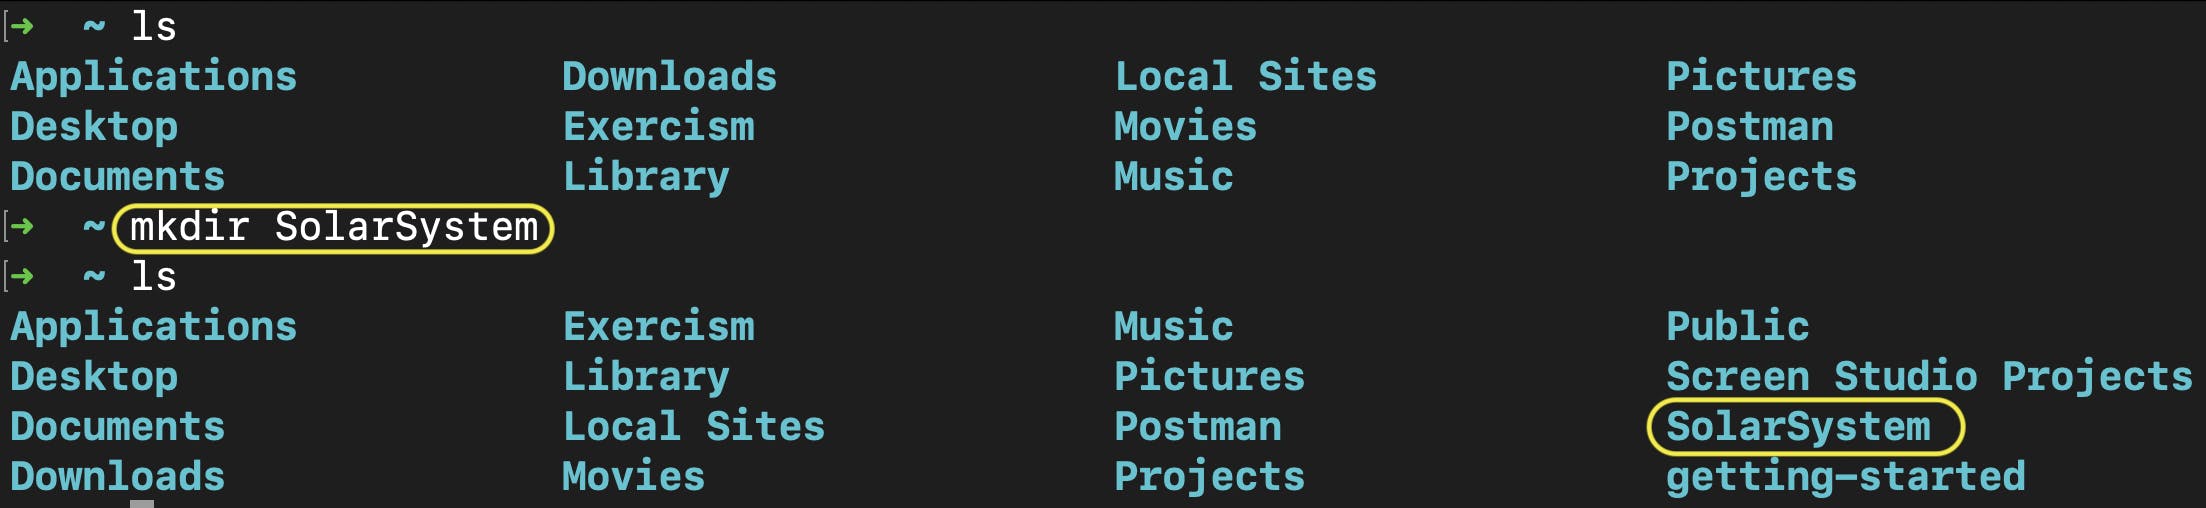
Creating a New Folder (mkdir command)
If you aren't in the root directory, please go ahead and do so. The first command you'll learn is the mkdir command which is for creating a new folder.
mkdir SolarSystem
Navigate inside the SolarSystem folder by typing cd SolarSystem.
The folder is currently empty. But we'll fill it up with a few directories now by typing in the following:
mkdir Mercury
mkdir Venus
mkdir Earth
mkdir Mars
mkdir Jupiter
mkdir Saturn
mkdir Uranus
mkdir Neptune
mkdir Pluto
If you list the folders in the current directory, you'll see the following:

Creating a New File (touch command)
You want to now use the touch command to create a new file. We want to go and add a file called Moons.txt by typing and entering the following command:
touch Moons.txt
Here's what you should see:

Renaming a File (mv command)
We have the Moons.txt file here created but we've changed our mind here now. We want to name some of the well-known stars around our solar system. Let's rename the file by using the mv command.
mv Moons.txt Stars.txt
If there isn't an existing directory the name of the file will be renamed. Here's what you'll see:

Copying a File (cp command)
Copying a file is done by using the cp command. Use the following command to create a copy of the Stars.txt. We'll call it Stars2.txt:
cp Stars.txt Stars2.txt
Stars2.txt will now have the same content as the source file.
Here's what to expect from this command:

Removing a File (rm command)
We now have both Stars.txt and Stars2.txt but we now want to remove one of the two since it doesn't make sense to have two files with the same content. To remove a file we run the rm command.
In this case, we'd like to remove the Stars2.txt file:
rm Stars2.txt
You won't see the file in the directory anymore:

Renaming a folder (mv command)
Not sure if you knew this, but Pluto is now considered a dwarf planet. So let's rename the Pluto folder into the dwarf-planets folder. You can do so with this command:
mv Pluto dwarf-planet
You'll see this in the terminal:

As you can see the folder is now renamed successfully.
The directory is looking good.
Removing a folder (rmdir or rm -r command)
We're going to want to remove the full SolarSystem folder now since we don't because practice makes perfect and you should recreate the folder on your own for muscle memory!
Let's go back one level and remove the SolarSystem folder by entering:
rm -r SolarSystem
You should no longer see your SolarSystem folder.

Note: If you want to remove an empty folder use the rmdir command.
Alright, that's all there is for now. This should be enough fundamentals on using the terminal that could get you started experimenting.
But if you'd like to explore commands further, go to this site and try to work on going through some exercises using this list of commands here.
I hope this was helpful and feel free to comment or share if you found this useful.